1.增加索引到自定义Entity
下面我们来使用代码定义一个entity.
下面定义了一个Request的Entity: mymodule/src/Entity/Request.php
<?php

namespace Drupal\mymodule\Entity;

use Drupal\Core\Entity\ContentEntityBase;
use Drupal\Core\Entity\EntityTypeInterface;
use Drupal\Core\Field\BaseFieldDefinition;

/**
 *
 * @ContentEntityType(
 *   id = "requests",
 *   label = @Translation("Requests"),
 *   handlers = {
 *     "view_builder" = "Drupal\Core\Entity\EntityViewBuilder",
 *     "list_builder" = "Drupal\Core\Entity\EntityListBuilder",
 *     "views_data" = "Drupal\views\EntityViewsData",
 *     "form" = {
 *       "default" = "Drupal\Core\Entity\ContentEntityForm",
 *       "add" = "Drupal\Core\Entity\ContentEntityForm",
 *       "edit" = "Drupal\Core\Entity\ContentEntityForm",
 *       "delete" = "Drupal\Core\Entity\ContentEntityDeleteForm",
 *     },
 *     "route_provider" = {
 *       "html" = "Drupal\Core\Entity\Routing\AdminHtmlRouteProvider",
 *     },
 *     "access" = "Drupal\Core\Entity\EntityAccessControlHandler",
 *   },
 *   admin_permission = "administer requests",
 *   base_table = "requests",
 *   translatable = FALSE,
 *   entity_keys = {
 *     "id" = "id",
 *     "uuid" = "uuid"
 *   },
 * )
 */
class Requests extends ContentEntityBase {

  /**
   * {@inheritdoc}
   */
  public static function baseFieldDefinitions(EntityTypeInterface $entity_type) {
    $fields = parent::baseFieldDefinitions($entity_type);

    $fields['method'] = BaseFieldDefinition::create('string')
      ->setLabel(t('method'));

    $fields['url'] = BaseFieldDefinition::create('string')
      ->setLabel(t('url'));


    return $fields;
  }

}
添加4条数据作为测试
$storage = \Drupal::entityTypeManager()->getStorage('requests');
$storage->create([
    'method' => 'POST',
    'url' => 'https://www.a.com'
  ])->save();

$storage->create([
    'method' => 'GET',
    'url' => 'https://www.b.com'
  ])->save();

$storage->create([
    'method' => 'PUT',
    'url' => 'https://www.c.com'
  ])->save();

$storage->create([
    'method' => 'DELETE',
    'url' => 'https://www.d.com'
  ])->save();
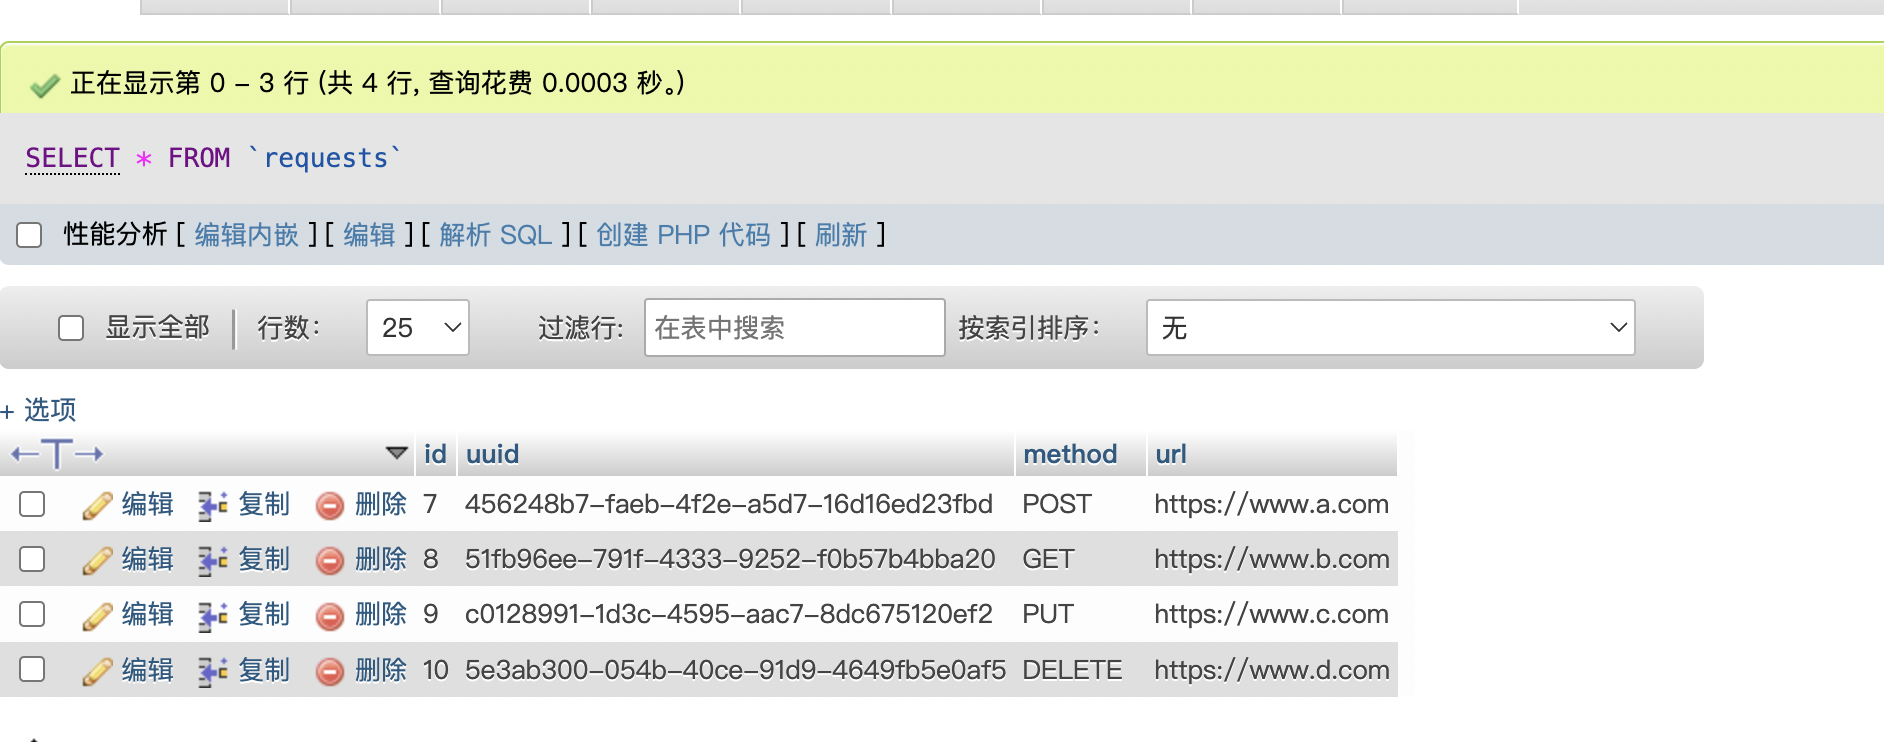
打开PHPMyAdmin查看会看到有4条数据.
现在执行一个自定义SQL查询数据
SELECT * FROM `requests` WHERE method="POST"
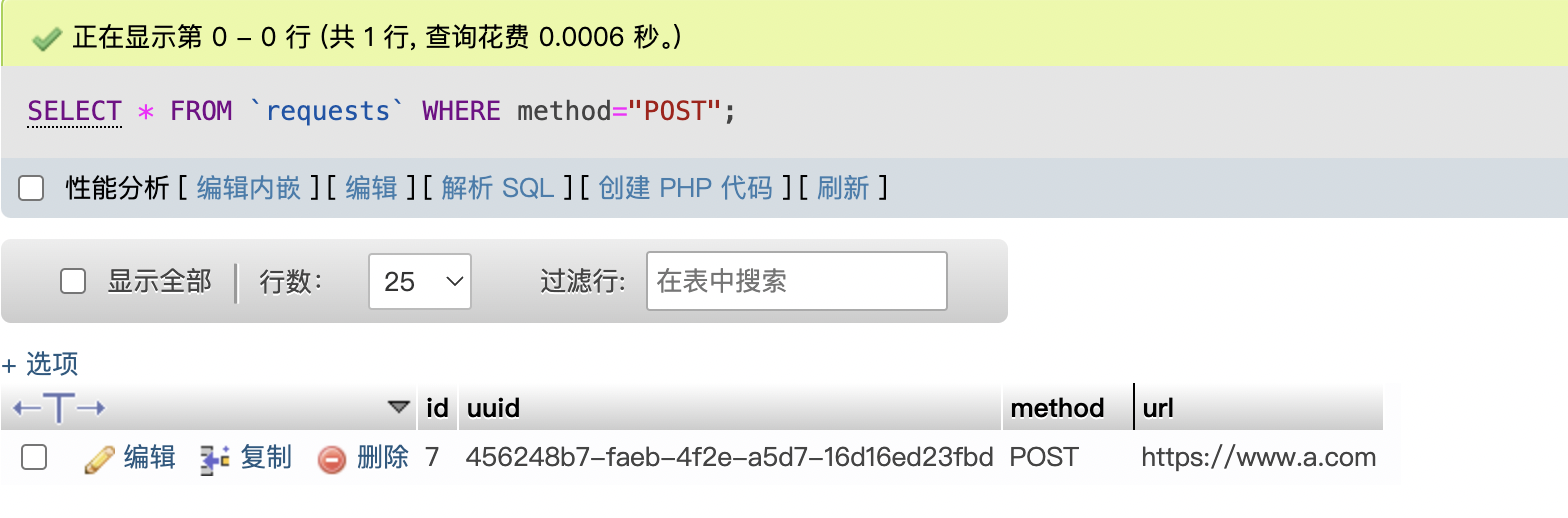
这里会很正常的显示一条.
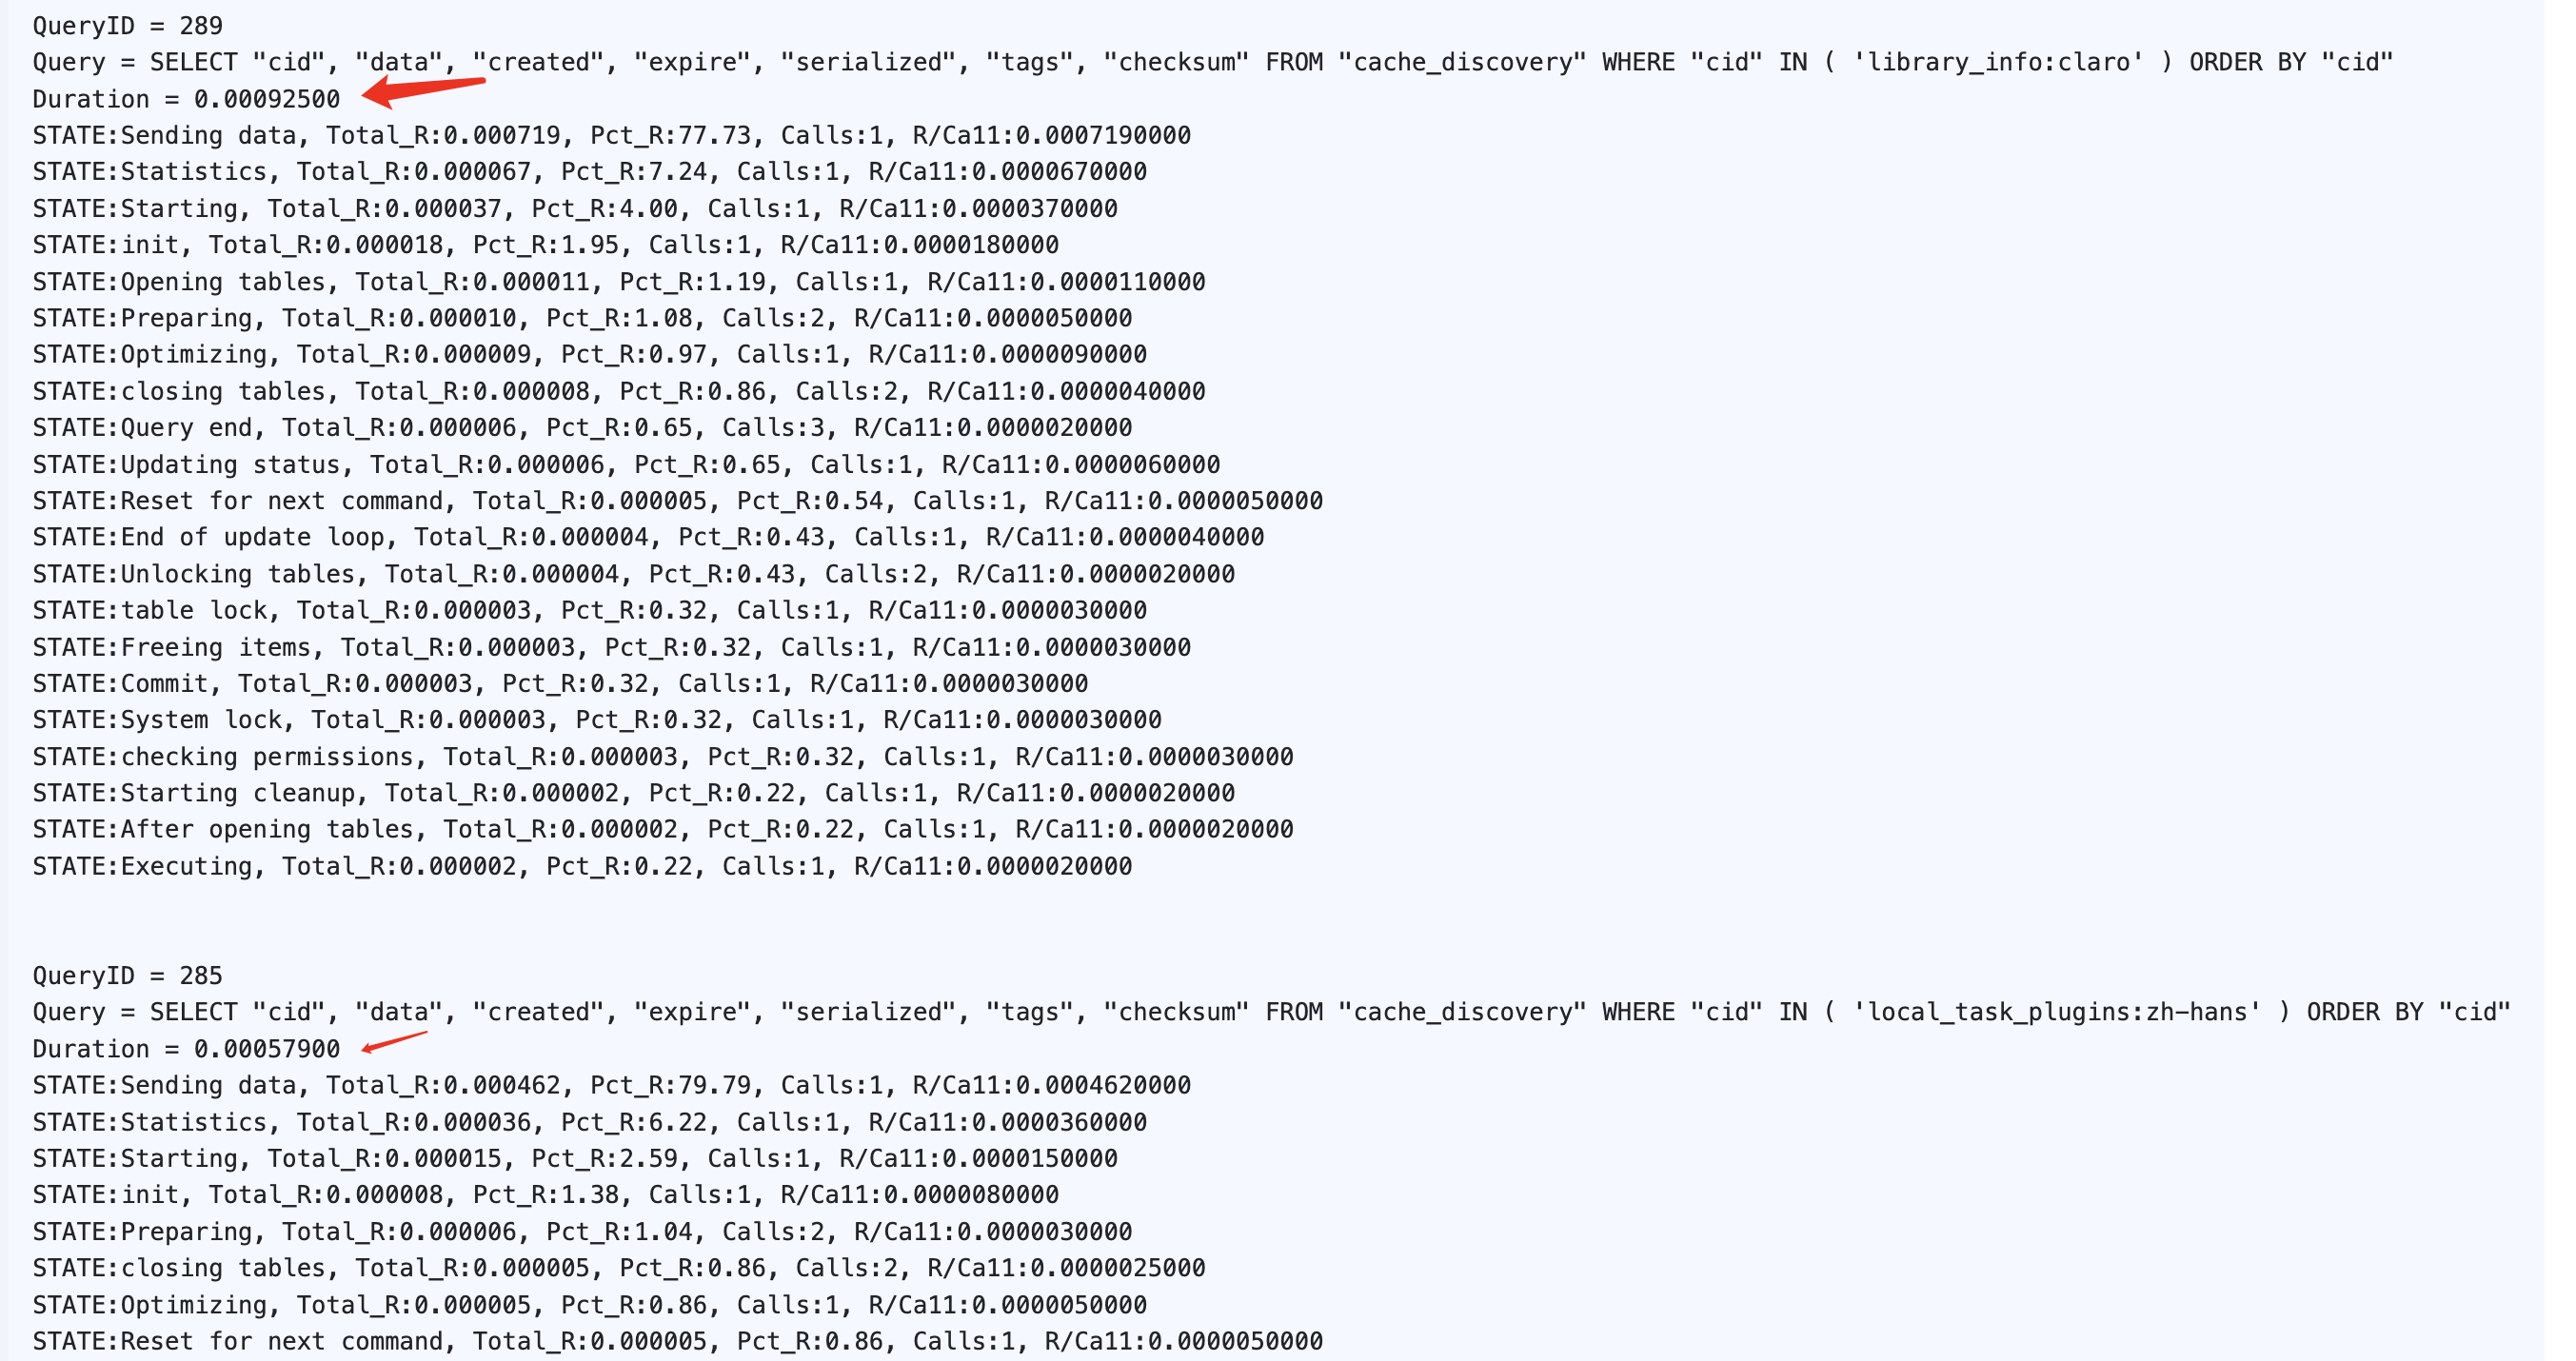
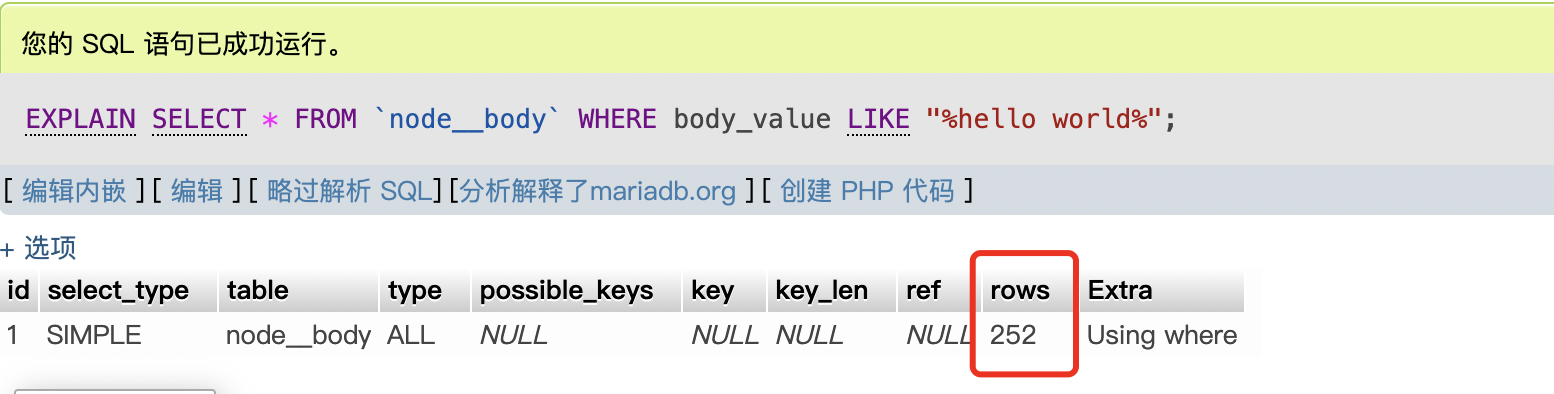
然后我们这边使用EXPLAIN来查看SQL查询细节
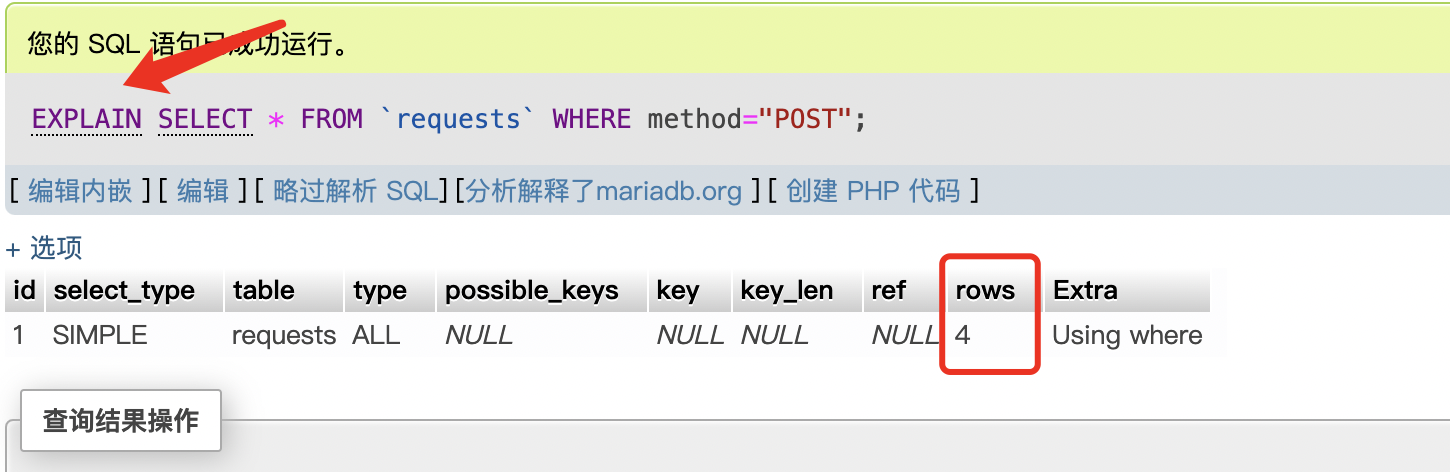
我们会发现我们想要的其实是其中一条数据. 但是SELECT他进行了全表扫描.
其主要原因是因为我没有对字段增加索引, 如果你要对表进行搜索你必须对其增加索引. 不增加就会全表扫描.
我们需要修改一下entity定义. 增加一个storage_schema
 *   handlers = {
 *     "view_builder" = "Drupal\Core\Entity\EntityViewBuilder",
 *     "list_builder" = "Drupal\Core\Entity\EntityListBuilder",
 *     "storage_schema" = "Drupal\mymodule\RequestsStorageSchema",
接着我们定义 mymodule/src/RequestsStorageSchema.php
<?php
namespace Drupal\mymodule;
use Drupal\Core\Entity\ContentEntityTypeInterface;
use Drupal\Core\Entity\Sql\SqlContentEntityStorageSchema;
/**
* Defines the Requests schema handler.
*/
class RequestsStorageSchema extends SqlContentEntityStorageSchema {
/**
* {@inheritdoc}
*/
protected function getEntitySchema(ContentEntityTypeInterface $entity_type, $reset = FALSE) {
$schema = parent::getEntitySchema($entity_type, $reset);
if ($data_table = $this->storage->getBaseTable()) {
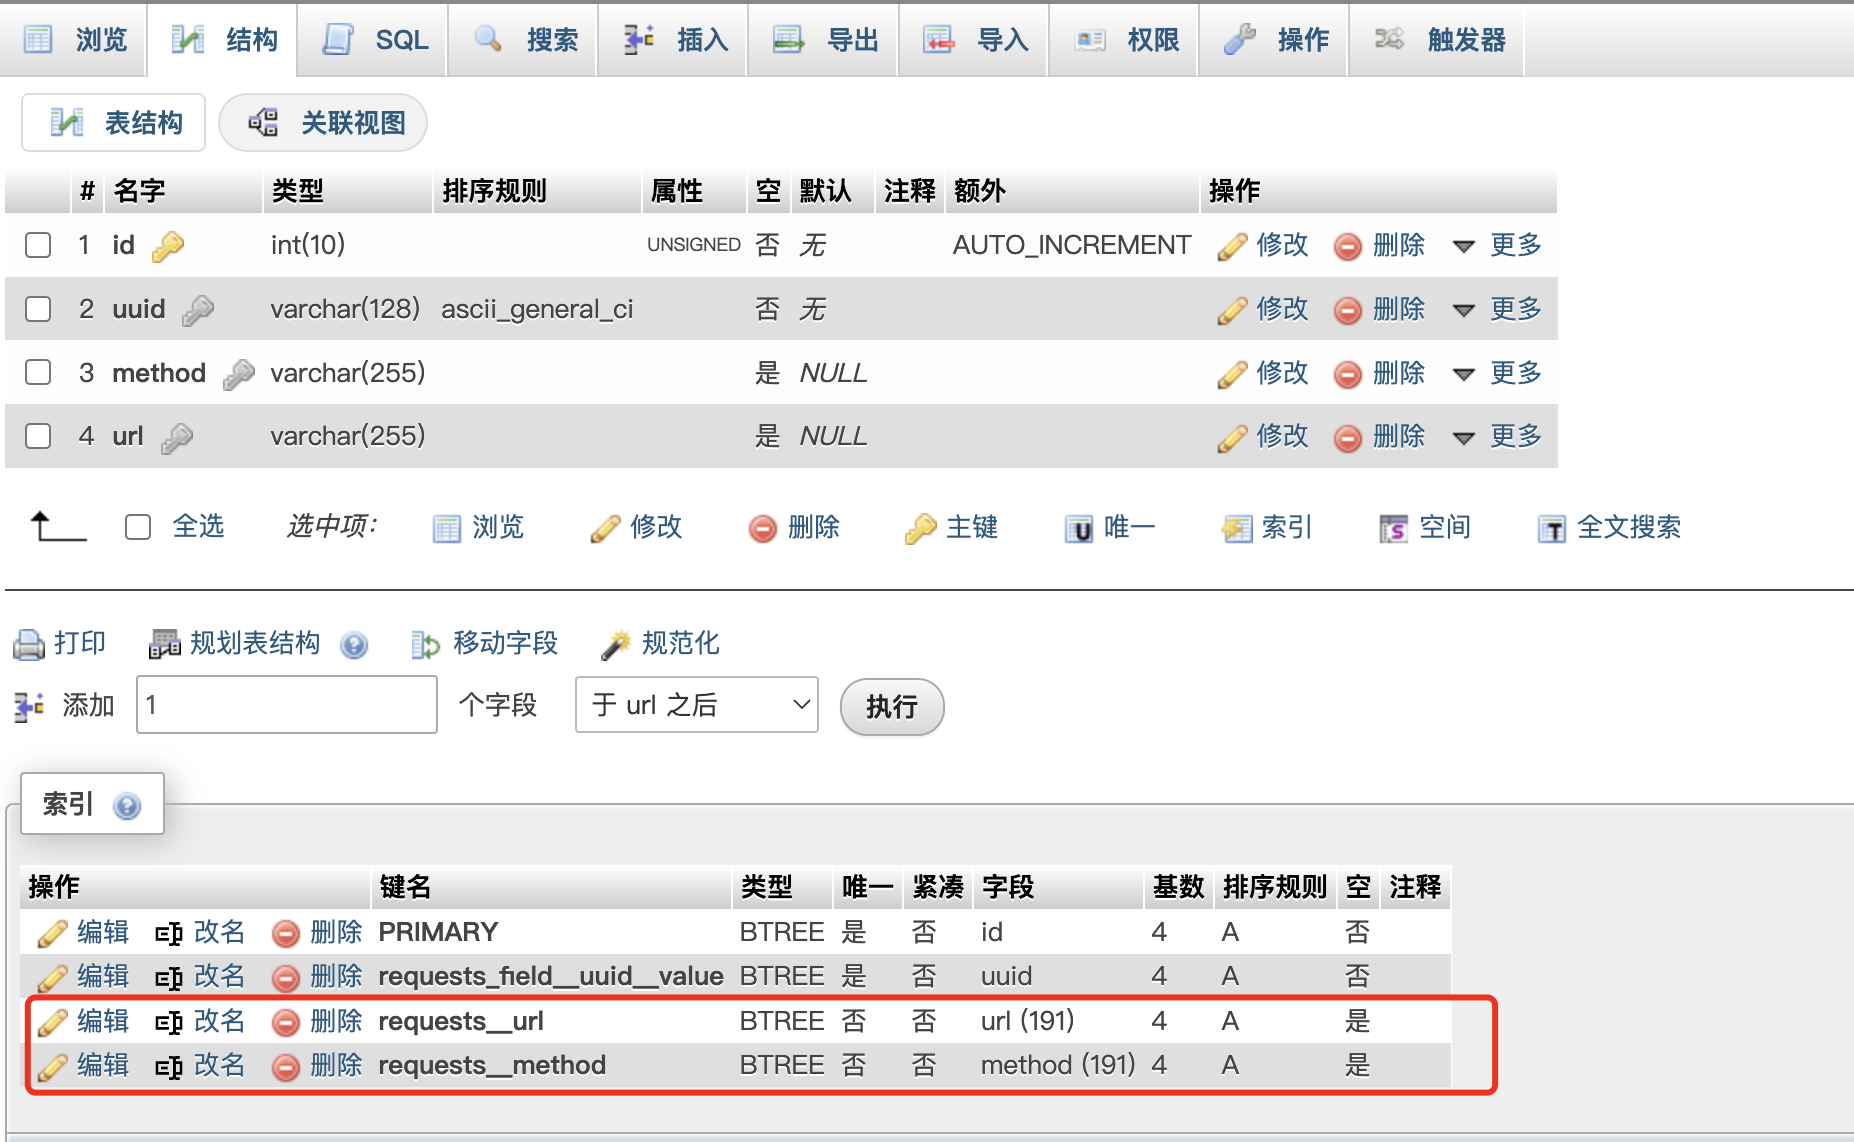
$schema[$data_table]['indexes'] += [
'requests__url' => ['url'],
'requests__method' => ['method'],
];
}
return $schema;
}
}
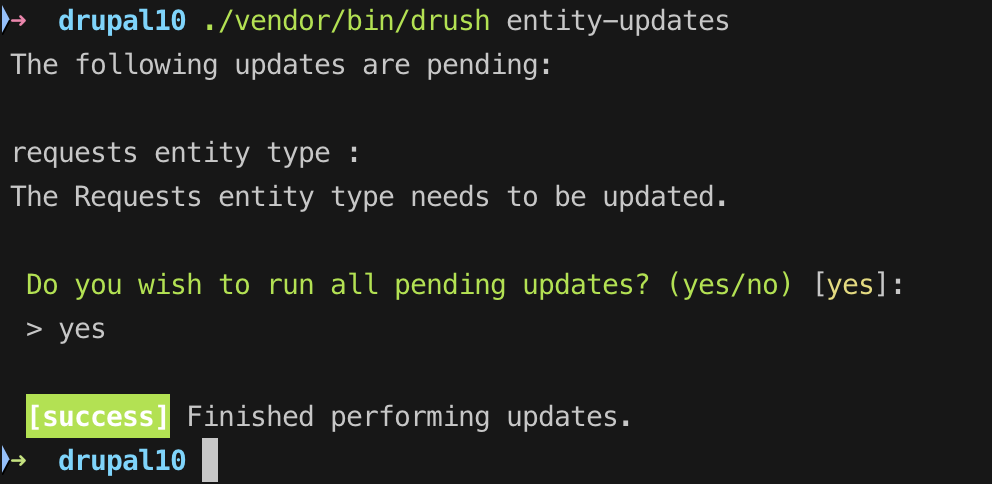
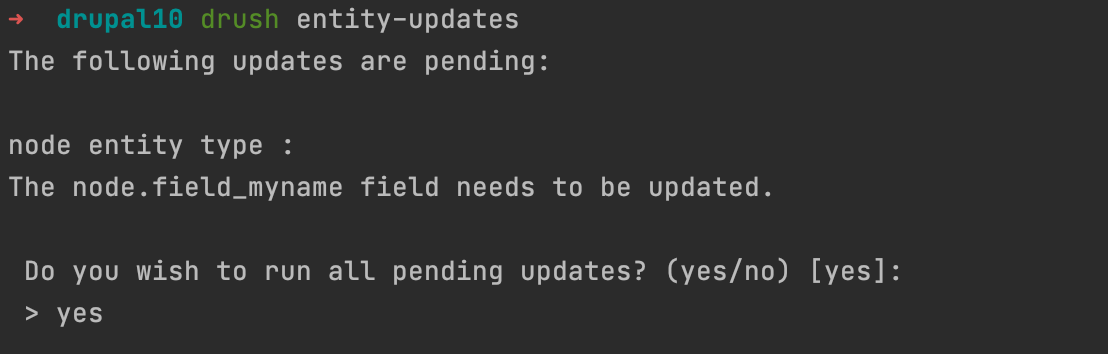
接着我们只运行: drush entity-updates, 此功能: https://www.drupal.org/project/devel_entity_updates
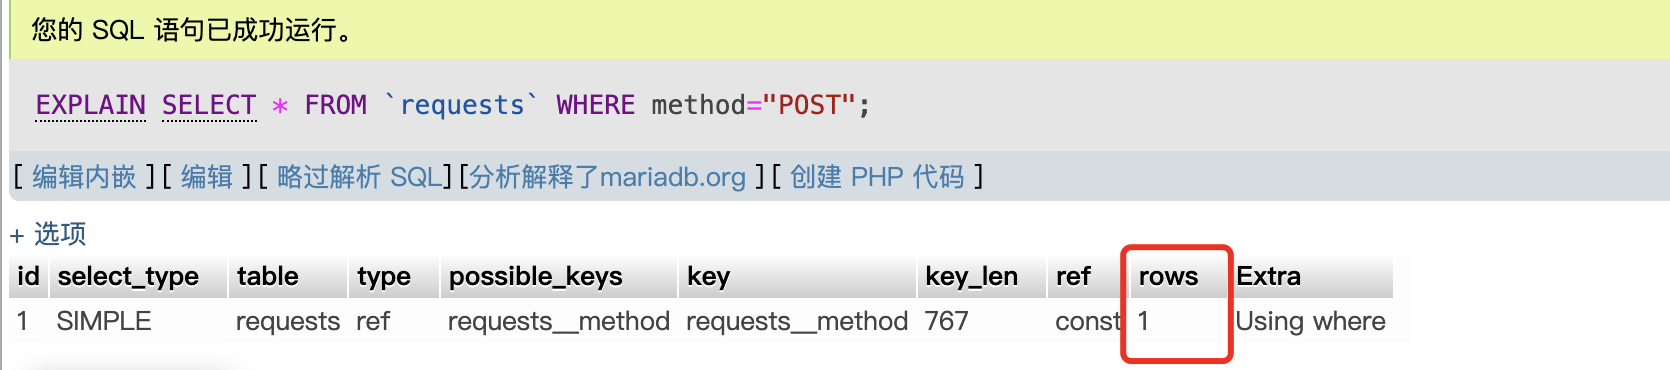
我们再运行上面的sql进行测试:
EXPLAIN SELECT * FROM `requests` WHERE method="POST"
这时候可以看到这里的rows已经变成了1
2.对Node Body字段和自定义字段增加索引
在系统的Node中. 我们经常需要对body也进行搜索. 但是body字段并没有索引所以就可能导致当文章很多的时候搜索会很漫.
自定义字段也是一样. 不会有索引. 我会在后台创建一个field_myname的字段

我们查询1条数据. 实际上他也是进行了全表扫描.
这里直接使用hook_entity_field_storage_info_alter
function mymodule_entity_field_storage_info_alter(&$fields, \Drupal\Core\Entity\EntityTypeInterface $entity_type) {
  if ($entity_type->id() == 'node' && !empty($fields['body'])) {
    $fields['body']->setIndexes(['value' => ['value']]);
    $fields['field_myname']->setIndexes(['value' => ['value']]);
  }
}
然后运行drush entity-updates
接着测试sql

暂时没有模块可以提供可以增加索引的功能. 有一个field_index的模块但是并不支持drupal10, 还有一个模块可以提示views中搜索字段没有增加索引views_index_hint